
How To Install a Garage Door frome Lide garage door company
Date: 09/24/2026
Garage Door Complete Installation Guide
Video:https://www.youtube.com/watch?v=vEqcL_OWA1s&t=4s
Installing a brand-new garage door may seem complicated. With proper tools and step-by-step procedures, ordinary homeowners can finish the installation by themselves. This tutorial references practical methods from This Old House, with safety emphasized throughout to help you assemble and install the door step by step. This project is moderately difficult, requiring work with numerous screws and hardware. For one person, the total working time is about 6–8 hours. The overall cost varies depending on the door size, style and material, roughly ranging from $500 to $2,000.
Important Warning: Garage door springs store massive tension and can cause severe personal injury if mishandled. Have an assistant for high-risk steps. Hire a professional installer if you are not confident.
1. Preparations: Tools, Materials & Safety Guidelines
Required Tools and Materials
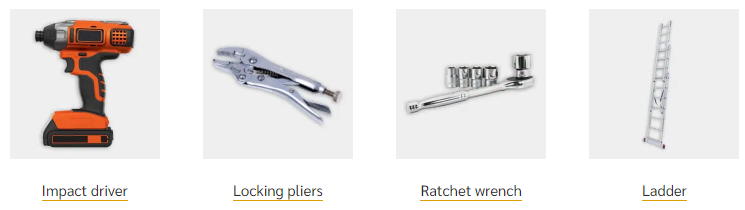
Door Components: Garage door panels, hinges, rollers, full track hardware, bottom weather seal, safety cables, lifting cables, lag screws. Hand Tools: Impact driver, ratchet wrench, locking pliers, sturdy step ladder, work gloves, safety goggles.
Practical Tip: Plan your garage door opener selection in advance. If living space sits above the garage, a belt-drive opener runs far quieter than a chain-drive model. A 3/4-horsepower motor is recommended; include it in your procurement list ahead of time.
Safety Precautions
- Springs are under high tension. Never stand directly in front of springs while disassembling, assembling or adjusting them.
- Door panels are heavy. Always get help when lifting panels; do not hoist heavy panels alone.
- Use a stable ladder for overhead work. Never stand on boxes or door panels to reach high places.
- Wear gloves and safety goggles at all times to avoid injury from metal debris or hardware.
- Springs can fly outward violently if broken. Safety cables must be installed for protection; this component cannot be skipped.
2. Install the Panel with hinge(Base of the Whole Door)
The bottom panel serves as the reference baseline for the entire garage door. Its positioning and hardware installation directly affect all subsequent steps.
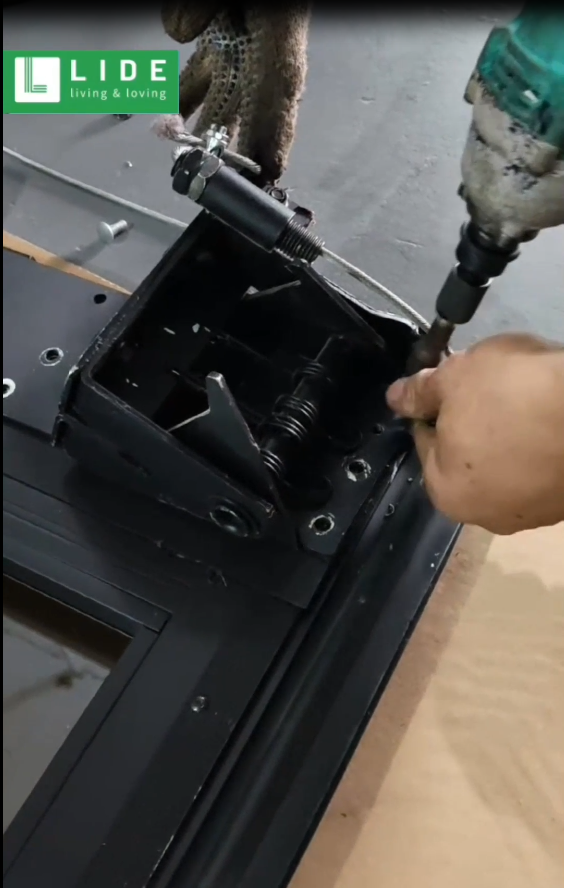
- Attach the bottom weather seal: Fit the weather seal along the lower edge of the bottom panel. Align it with the door profile, secure the seal retainer, drill holes and fasten bolts to block wind, rain and dust from entering the garage.
- Mount cable brackets: Install cable brackets at the left and right corners of the bottom panel. These brackets are anchor points to connect lifting cables later. Fasten them firmly into the wood or metal reinforcement layer on the panel with lag screws.
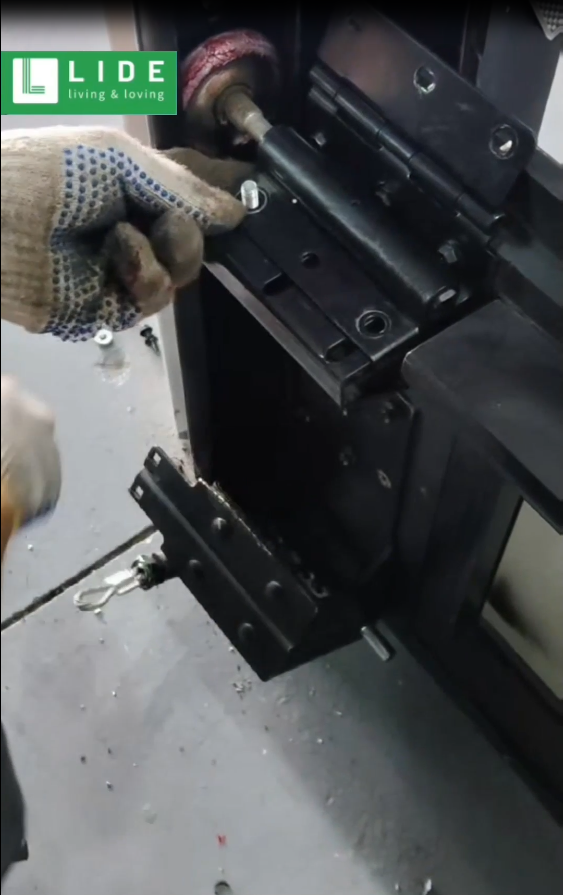
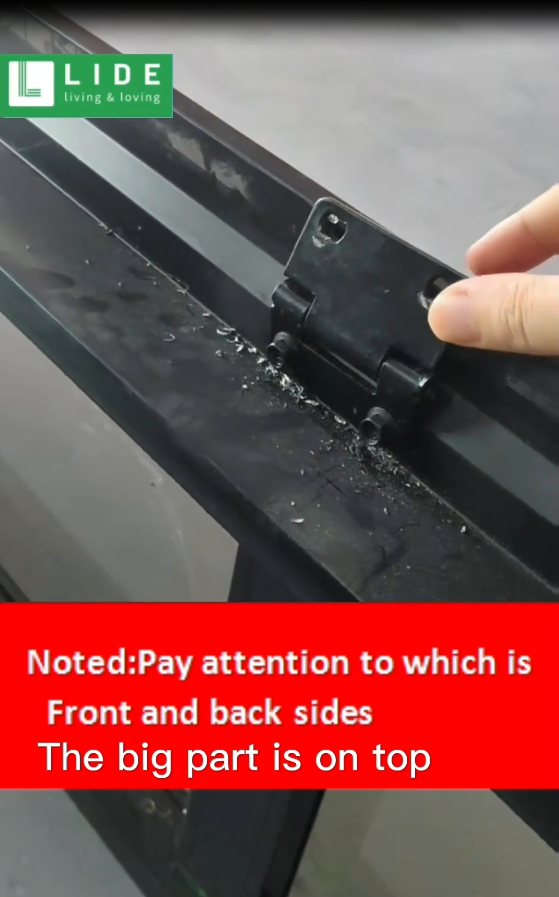
- Pre-install hinges: Mount hinges at panel joints. Hinges allow panels to bend and slide along tracks. Do not install hinges and rollers on one side of the bottom panel temporarily, making it easier to slide the panel into the doorway. Add these hardware pieces after the panel is set in place.
- Center the panel: Place the bottom panel inside the garage doorway. Position it centrally with equal gaps on both sides.
3. Mount Vertical Side Tracks
Once the bottom panel is properly positioned, install vertical tracks that guide the door as it slides up and down.
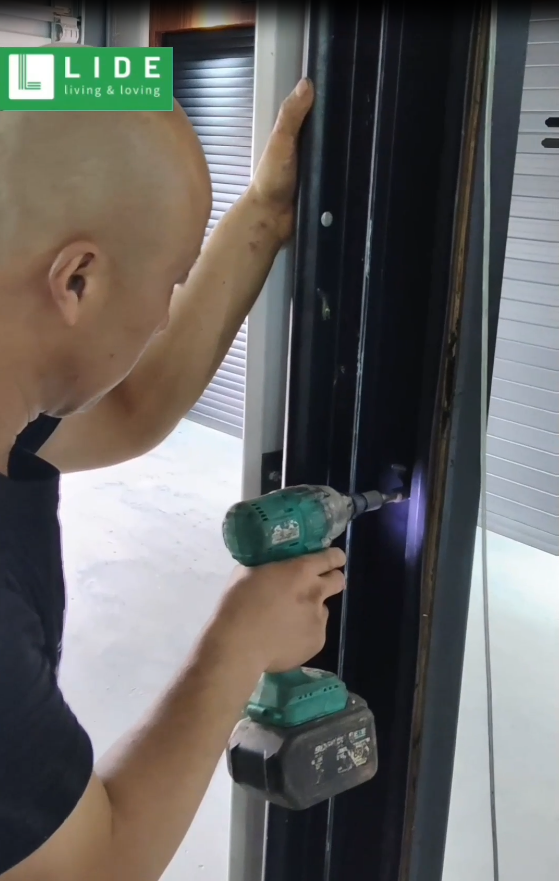
- Fit rollers into the panel hinges and brackets. Slide vertical tracks over the rollers and press the tracks against the doorway framing. Secure tracks with lag screws. Do not fully tighten bolts yet; leave slack for later alignment adjustments.
- Align the tracks parallel to the door edge with a small clearance between tracks and panels to prevent rubbing, jamming and noise during operation. After confirming equal gaps on both sides, gradually tighten all bolts.
- Verify all rollers sit securely inside track grooves and cannot pop out
4. Install Remaining Panels in Sequence and Mount Horizontal Tracks
Panels stack upward one by one. Upper panels must align neatly with the panel below, connected by hinges.
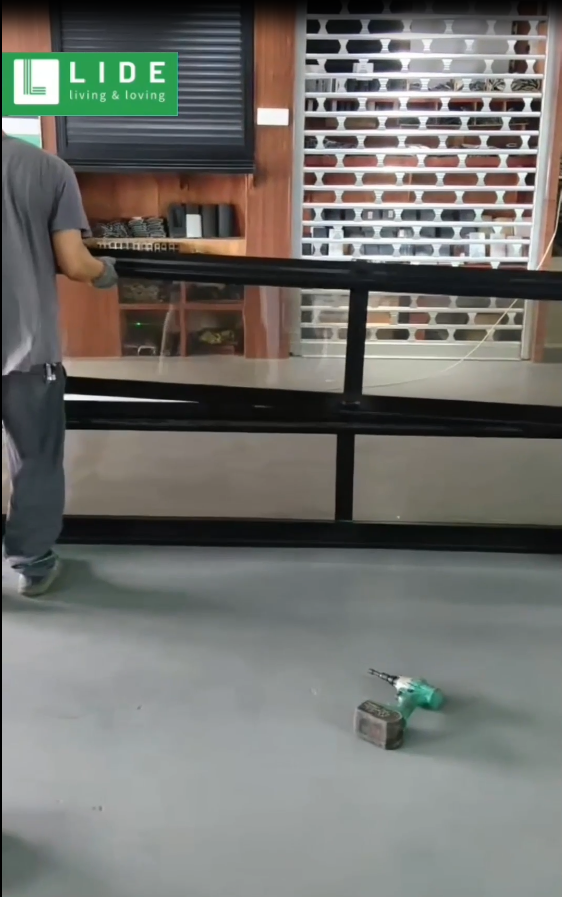
- Middle panels: Have an assistant lift the second panel and set it steadily on top of the bottom panel. Align panel seams, fasten hinges and insert rollers into tracks. Repeat this process to finish all intermediate panels.
- Top panel: Install the top horizontal tracks before fitting the top panel. The top panel connects to the spring assembly. Mount top roller brackets and fine-tune positioning to keep the door square and aligned.
- Connect vertical tracks to curved horizontal track sections. Secure track brackets to ensure a smooth transition with no misalignment.
Pro Tip for Installation: Use locking pliers to temporarily clamp tracks when installing the top panel, preventing accidental door drop and injury.
5. Install Springs, Lifting Cables and Safety Cables
This is the highest-risk phase of the entire installation. Strictly follow manufacturer instructions and exercise extreme caution with all spring-related work.
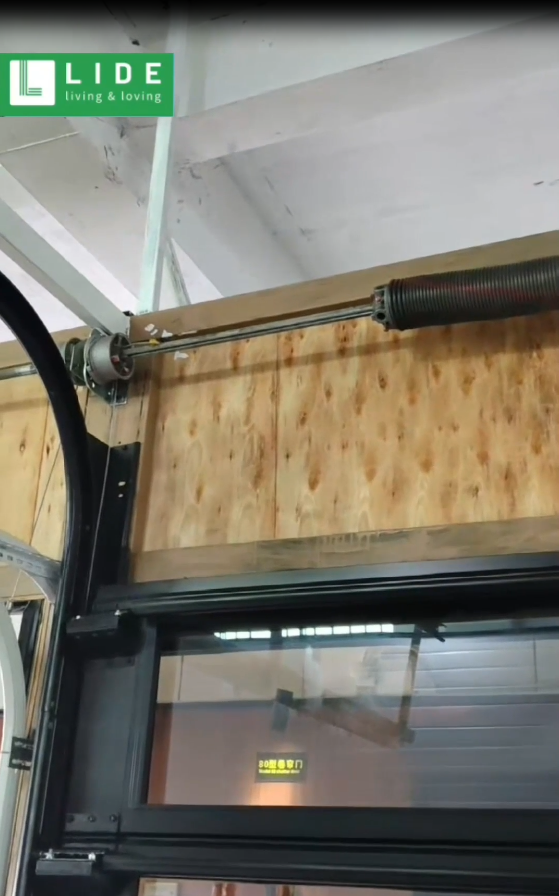
- Secure the spring assembly: Mount springs onto track brackets following product specifications. Springs act as the "muscle" of the garage door to counterbalance door weight so the door can lift and lower easily.
- Route lifting cables: Attach one end of each lifting cable to corner brackets on the bottom panel. Run cables upward around pulleys at the track ends and connect them to the spring assembly. Tighten cables to proper tension without slack or tangling.
- Install safety cables (mandatory): Thread safety cables through the center of each spring and fasten both ends to brackets on either side of the spring. If a spring snaps, safety cables contain it and stop it from flying at high speed and hurting people.
6. Final Adjustment and Safety Testing
Once all components are assembled, do not install the opener immediately. First manually test door performance and complete balance and alignment adjustments.
- Door balance test: Manually lift the door halfway and release it. A properly balanced door stays steadily in place; it should not drop down or spring upward on its own. If it drifts up or down, spring tension needs adjustment.
- Track operation inspection: Manually open and close the door fully several times. Watch for smooth travel with no track rubbing, jamming or abnormal noise. If friction occurs, reposition tracks.
- Electric opener safety test: If an electric opener is fitted, test the auto-reverse safety feature. When an obstacle blocks the door while closing, the door must stop instantly and reverse upward.
- Recheck all fasteners: Inspect bolts, brackets and cables from top to bottom to confirm nothing is loose.
7. Installation Summary
DIY garage door installation saves labor costs, yet the main hazards lie within the spring tension system. This work demands care and patience. Proper alignment and tightness of every screw and cable determine the service life of your door. If you cannot achieve balanced door movement or feel unsure about spring adjustment, do not force the work. Contact a professional installer. Safety always comes first.
Complete all manual tests before installing and tuning your garage door opener. Belt-drive openers deliver quieter operation if living quarters are above the garage.